How To Sharpen Hedge Trimmer Blades
A practical step-by-step guide to how to sharpen hedge trimmer blades, including preparation, instructions, common issues, tips, and next steps.
How To Sharpen Hedge Trimmer Blades
A sharp hedge trimmer makes clean, healthy cuts that protect your plants from disease and looks neater. Blunt blades, on the other hand, tear and crush stems, creating a ragged finish and stressing the hedge. This guide provides a complete, field-tested method to safely restore your trimmer's cutting edge, ensuring better results, less effort, and a longer life for your tool. Whether you're doing seasonal maintenance or recovering from a tough job, these steps will get your machine cutting like new.
Fast Answer
- Disconnect Power: Unplug cord, remove battery, or detach spark plug.
- Clean Blades: Scrub off all sap, resin, and debris.
- Secure Tool: Clamp the blade bar firmly in a vice.
- File Edges: Use a flat file or rotary tool to sharpen each tooth, matching the factory angle.
- De-burr: Lightly file the flat back of the blades to remove metal burrs.
- Lubricate: Apply a thin coat of oil and test.
Before You Start
Preparation is key to a safe and effective sharpening job. Gathering your tools and setting up a stable workspace prevents mistakes and ensures you get a consistent, sharp edge across every cutting tooth. Don't be tempted to skip the cleaning stage; sharpening a dirty blade grinds grime into the metal and clogs your sharpening tools.
What You Need
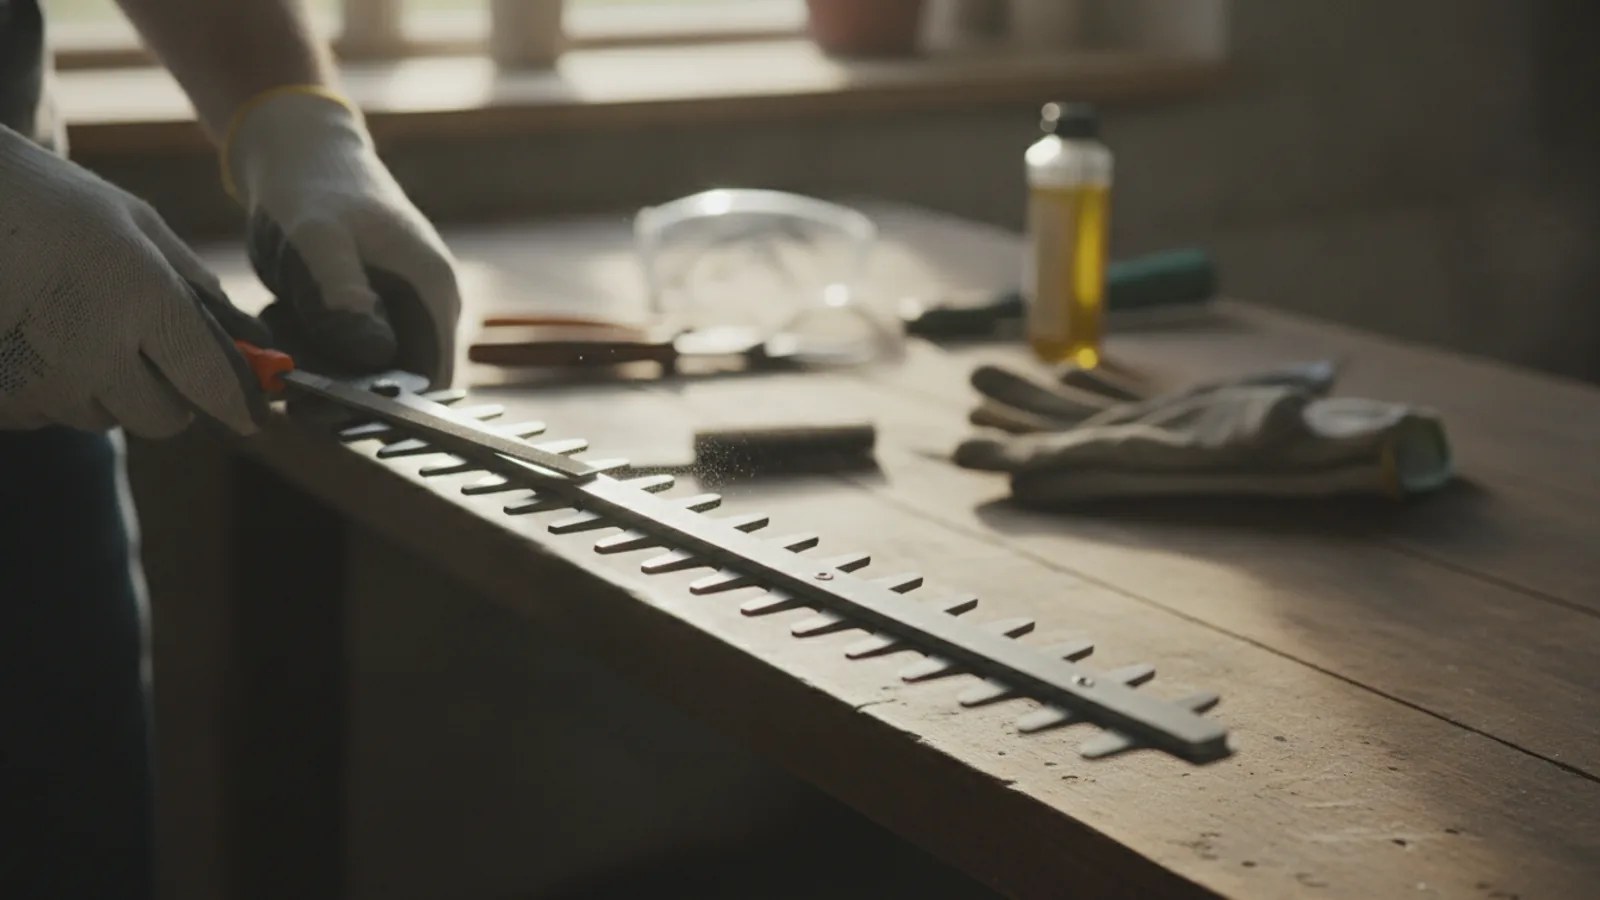
- Safety Equipment: Thick work gloves and safety goggles are non-negotiable.
- Cleaning Supplies: A stiff-bristled brush, clean cloths, and a resin solvent (or white spirit).
- Workshop Vice: A bench-mounted vice is essential for holding the blades securely and safely.
- Sharpening Tool: A 10-inch mill bastard file (a type of flat file) is the standard choice. Alternatively, a rotary multi-tool (like a Dremel) with a grinding stone attachment can be used.
- Honing Tool (Optional): A diamond hone or fine-grit whetstone for removing burrs.
- Lubricant: A quality machine oil, such as 3-in-1, or a dedicated blade lubricant spray.
- Basic Hand Tools: Spanners or a socket set might be needed if you have to remove the blade bar from the trimmer body.
Safety, Timing, and Context Checks
- Power Disconnection: Before you do anything else, ensure the tool is completely powerless. For corded models, unplug it from the wall. For cordless models, remove the battery pack. For petrol models, disconnect the spark plug lead. This eliminates any risk of accidental startup.
- Consult Your Manual: Give your hedge trimmer's instruction manual a quick read. It may contain specific advice on blade removal, tensioning, or recommended sharpening angles for your model.
- Choose the Right Time: The best time to sharpen your blades is at the end of the cutting season before storage, or at the beginning of a new season before you start work. Sharpening a clean tool is always easier.
Step-by-Step Instructions
Follow these steps methodically. The key to a good result is consistency—applying the same angle and pressure to every single tooth on the blade.
Secure the Trimmer or Blade Bar
A stable tool is a safe tool. Open your bench vice wide enough to clamp the blade bar. Do not clamp the trimmer's motor housing or handles. The ideal setup is to clamp the bar so the teeth you are working on are pointing upwards and away from you at a comfortable working height. If you find it difficult to get good access, you may need to unbolt the entire blade assembly from the trimmer body first. This usually involves removing two to four bolts where the blades meet the machine. Once clamped, try to wiggle it; it should be completely solid and unmoving.
Thoroughly Clean the Blades
Blades accumulate a sticky mixture of plant sap, resin, and dirt. This gunk can hide the true cutting edge and will quickly clog your file. First, use a stiff brush to remove loose leaves, twigs, and dried mud. Next, apply a resin solvent or white spirit to a cloth and meticulously wipe down both sides of each blade. Pay close attention to the area where the two blades slide against each other. Continue until the metal is clean and bright. Wipe everything dry with a clean cloth before proceeding.
Inspect the Blades and Identify the Cutting Angle
Look closely at the teeth. Each tooth will have a flat side and an angled, sharpened side (the bevel). You will only ever sharpen the angled side. Never file the flat side, as this maintains the critical gap between the blades. Look at the angle of the bevel; this is the factory edge you want to replicate. It's typically around 30-45 degrees. Also, check for any significant nicks or dings in the metal. Small ones can be filed out, but a broken or badly bent tooth may mean the blades need replacing.
Sharpen the First Blade's Teeth with a File
Put on your gloves and goggles. Take your flat file and lay it on the bevel of the first tooth. Match the factory angle as closely as possible. The key is the motion: apply firm, even pressure and push the file in one direction, from the base of the tooth towards the tip. Lift the file off the blade to bring it back to the starting position. Do not saw back and forth, as this will dull the file and create a rounded edge. Count your strokes—between 5 and 10 smooth strokes should be enough for a moderately dull tooth. The goal is to see fresh, shiny metal along the entire cutting edge.
Complete One Side Systematically
Once you are happy with the first tooth, move to the next one and repeat the process. Use the exact same angle and the same number of strokes. Work your way methodically down the entire length of the blade, sharpening every tooth that faces you. Consistency is what creates a balanced, effective cutting tool. Rushing this stage will lead to an uneven cut and can cause the trimmer to vibrate excessively during use.
Flip and Sharpen the Opposite Blade
Most hedge trimmers have double-sided, reciprocating blades. This means there is another set of cutting teeth on the other blade, usually facing the opposite direction. You will need to sharpen these too. Carefully unclamp the blade bar, flip it over 180 degrees, and reclamp it securely in the vice. Now repeat the sharpening process (Steps 4 and 5) on this second set of teeth, again matching the factory angle and using a consistent number of strokes on each one.
Remove the Burrs for a Clean Finish
Sharpening creates a tiny fringe of waste metal on the flat, underside of the tooth, known as a 'burr'. This rough edge will snag on fibres and prevent a truly clean cut. To remove it, take your diamond hone or whetstone (or even the flat file, used very gently) and lay it perfectly flat against the back of the sharpened teeth. Make one single, light pass along the length of the blade. This will shear off the burr, leaving a crisp, sharp edge. Do not overdo this or you will create a new bevel on the wrong side.
Lubricate, Reassemble, and Test
The final step is to protect your work. Apply a light coating of machine oil or blade lubricant along the entire length of the blades, ensuring some gets between them. This prevents rust and helps the blades slide smoothly against each other. If you removed the blade assembly, now is the time to reattach it to the trimmer body. Tighten the bolts firmly but do not overtighten, as this can cause the blades to bind. Refer to your manual for specific torque settings if available. Once reassembled, reconnect the power and, with extreme caution, run the trimmer for a few seconds to distribute the oil and check for smooth operation.
Quick Reference
| Situation | Use this | Why |
|---|---|---|
| Blades are tearing leaves, not cutting | A flat file at the factory angle | Restores the sharp edge needed for a clean, slicing action. |
| Sticky brown resin on blades | Resin solvent or white spirit | Dissolves sap so you can see the metal edge and prevent file-clogging. |
| Struggling to maintain the right angle | Permanent marker on the bevel | Provides visual feedback on where the file is removing metal. |
| Edge feels rough after sharpening | A diamond hone flat against the back | Removes the metal burr for a perfectly crisp and effective cutting edge. |
Common Problems When You Sharpen Hedge Trimmer Blades
Even with care, you can run into a few common issues. Here’s how to identify and fix them.
- Problem: The blades still don't cut cleanly.
Solution: This usually means one of two things: the sharpening angle was too steep (blunt), or you didn't remove enough metal. Re-inspect the factory bevel and try again with more consistent strokes. Another common cause is incorrect blade tension. The bolts holding the blades together may be too loose, allowing twigs to get trapped instead of being cut. Check your manual for how to adjust this tension. - Problem: I've created a rounded, curved edge on the teeth.
Solution: This is a classic sign of using a "sawing" motion with the file instead of a straight, one-way push. A rounded edge has no cutting power. To fix it, you must carefully re-establish a flat bevel by focusing on holding the file steady and only applying pressure on the forward stroke. - Problem: The trimmer vibrates more than usual or makes a grinding noise.
Solution: The bolts holding the blades might be too tight, causing them to bind. Loosen them slightly until the blades can move freely but without a large gap. It could also be that you've filed unevenly, leaving some teeth longer than others. A final cause could be a lack of lubrication. Always oil the blades after sharpening.
Advanced Tips for how to sharpen hedge trimmer blades
Once you're comfortable with a file, you might consider these more advanced techniques for a faster or finer result.
- Using a Rotary Tool: A multi-tool like a Dremel with a grinding stone attachment can speed up the job significantly. However, it requires much more control. Use a low speed setting to avoid overheating the blade, which can ruin the metal's temper (its hardness). Let the tool do the work; use a light touch and match the factory angle just as you would with a file. This method is best for experienced users.
- Achieving a Razor Edge with a Whetstone: For the absolute sharpest finish, you can hone the edge with a whetstone or diamond stone after filing. This removes the microscopic scratches left by the file. This is generally overkill for most garden hedges but can be satisfying. It is most effective for maintaining an already-sharp edge rather than restoring a very dull one.
- Addressing Blade Tension: The performance of your hedge trimmer relies heavily on the gap between the blades. There is usually a series of bolts along the blade bar with lock nuts. By adjusting these, you can control the pressure between the blades. The ideal tension allows the blades to slide smoothly past each other with minimal friction but be close enough to cut cleanly, like a pair of scissors. Consult your manual, as the procedure varies between manufacturers.
How To Sharpen Hedge Trimmer Blades FAQ
How often should I sharpen my hedge trimmer blades?
For a typical home garden, sharpening once per year is usually sufficient. However, if you have very large, woody hedges or use your trimmer extensively, you may need to sharpen it after every 20-25 hours of use. The best indicator is performance: when you notice the trimmer is chewing or tearing branches instead of slicing them, it's time to sharpen.
Can I over-sharpen the blades?
Yes. Each time you sharpen, you remove a small amount of metal. Over time, the teeth will become shorter. The main danger, however, is using a power grinder too aggressively and overheating the metal, which makes it soft and unable to hold an edge. Stick to light, controlled passes.
What is the best sharpening tool for a beginner?
A 10-inch mill bastard file is the best tool for beginners. It offers excellent control, removes metal at a manageable rate, and makes it easier to feel the correct angle. It is also inexpensive and widely available.
Is it necessary to remove the blades from the trimmer?
It's not always necessary, but it is often much easier. Removing the blade assembly allows you to clamp it more securely in a vice, giving you better access and control for a more consistent and safer sharpening job. It also makes the cleaning process far more thorough.
Final Checklist for how to sharpen hedge trimmer blades
Before you pack up, run through this final checklist to ensure the job is complete and your tool is ready for safe operation.
- Power Source Disconnected: The battery is out, the plug is pulled, or the spark plug is detached.
- Blades are Clean: All sap, resin, and debris have been removed.
- Edges are Consistent: Every tooth has been sharpened to the same angle and looks uniformly bright.
- Burrs Removed: The flat back of the blades is smooth to the touch, with no rough metal fringe.
- Blades Lubricated: A thin film of oil has been applied along the length of the blades.
- Components Tightened: Any bolts you loosened or removed are now securely fastened to the manufacturer's specification.
- Safety Gear Used: You wore your gloves and goggles from start to finish.