How To Check Tire Tread
A practical step-by-step guide to how to check tire tread, including preparation, instructions, common issues, tips, and next steps.
How To Check Tire Tread
Checking your vehicle's tyre tread is a fundamental safety and legal check that every driver should be able to perform. Worn tyres drastically reduce grip, especially in wet weather, increasing braking distances and the risk of skidding. This guide provides simple, field-tested instructions for checking your tread depth using both the common 20p coin method and a dedicated gauge, helping you stay safe, legal, and aware of your vehicle's condition.
Fast Answer
- Tool to Use: A 20p coin or a tread depth gauge.
- What to Check: Insert the coin or gauge into the main tread grooves.
- The Legal Limit (UK): Your tread must be at least 1.6mm deep.
- Key Visual Check: If you can see the outer band of the 20p coin, your tread is likely too low.
- Frequency: Check monthly and before any long journey.
Before You Start
- A Safe, Level Parking Spot: You need a flat surface where the vehicle won't roll.
- A 20p Coin: The border on a 20p coin is the perfect size for a quick check against the 1.6mm legal limit.
- A Tyre Tread Depth Gauge (Recommended): For a precise, numerical reading, a dedicated gauge is the best tool.
- Good Lighting: A torch or headlamp is useful for seeing clearly inside the wheel arches and tread grooves.
- Gloves (Optional): Tyres are dirty; gloves will keep your hands clean.
Step-by-Step Instructions
Park Safely and Position the Wheels
Your safety is the first priority. Park your car, van, or trailer on a solid, level surface—not on a slope, soft ground, or loose gravel. Apply the handbrake fully and ensure the engine is off. For checking the front tyres, it’s extremely helpful to turn the steering wheel to full lock, either left or right. This will expose the entire tread of one of the front tyres, making it much easier to access and inspect without awkward reaching.
You don't need to lift the vehicle. Performing these checks with the vehicle's weight on the tyres gives a true reflection of their condition in normal use. Give the vehicle a gentle push to confirm it is stable and won't move before you begin.
Clean the Treads and Find the Wear Indicators
Tyre grooves can become clogged with mud, stones, and other road debris. Before measuring, use a sturdy brush or a screwdriver to gently clear out any blockages from the main grooves where you plan to measure. This ensures your measurement is accurate.
While you're cleaning, look for the tread wear indicators. These are small, raised bars of rubber—usually about 13mm wide—moulded into the bottom of the main longitudinal grooves of the tyre. They are typically marked on the sidewall by a small triangle or the letters 'TWI'. These bars are set at exactly 1.6mm. If the surface of your tyre tread is level with these indicator bars, the tyre is on the legal limit and must be replaced immediately.
Perform the 20p Test
The 20p coin test is a simple, reliable way to quickly gauge if your tread depth is approaching the legal limit. The design of the coin provides a handy built-in measuring tool.
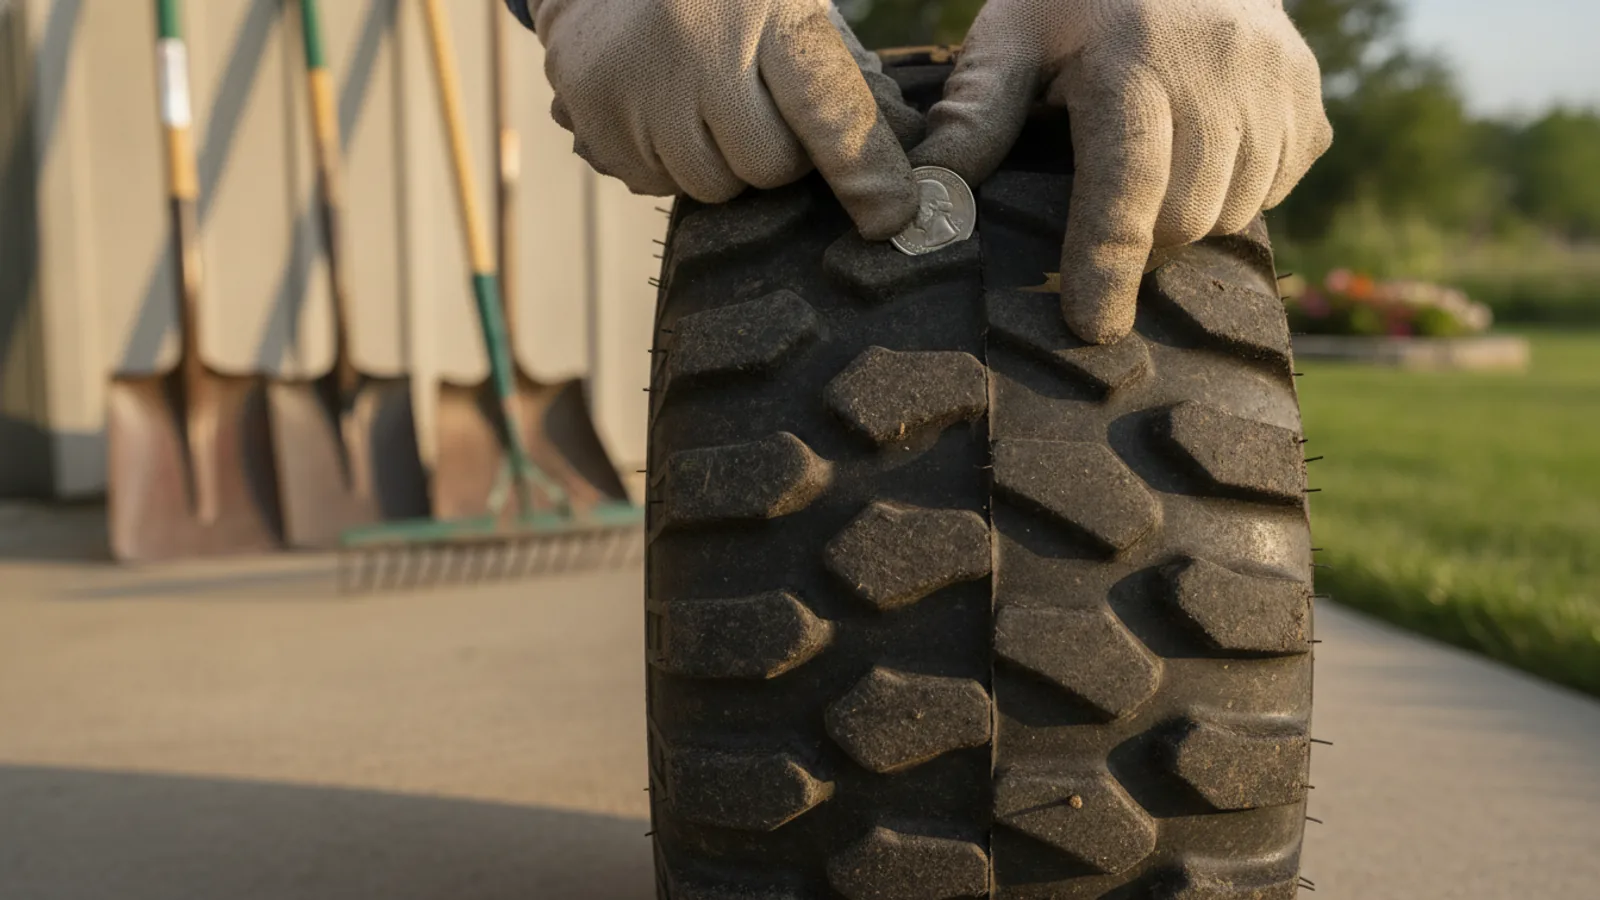
Take a standard UK 20p coin and insert it into one of the main tread grooves in the central part of the tyre. The key area to observe is the outer band or border of the coin that contains the inscription "TWENTY PENCE".
- If the outer band of the 20p coin is hidden when inserted into the tread, your tread depth is above the legal limit.
- If you can see the outer band of the 20p coin, your tread is likely below 1.6mm. This is a critical warning sign that your tyre needs to be professionally inspected and almost certainly replaced.
Check Multiple Locations on Each Tyre
A single measurement is not enough. The law requires the 1.6mm minimum depth to apply to the central 75% (three-quarters) of the tread's breadth and around the entire outer circumference. Tyres can wear unevenly, so you must check several spots to get a complete picture.
For each tyre, perform your check (with a coin or gauge) in at least three different places around its circumference—think of the 12 o'clock, 4 o'clock, and 8 o'clock positions. At each of these points, measure the depth in the innermost main groove and the outermost main groove (within that central 75% band). The lowest measurement you find anywhere on the tyre is the one that counts legally and for safety.
Use a Tread Depth Gauge for an Accurate Reading
While the 20p test is a great pass/fail indicator, a dedicated tread depth gauge gives you a precise measurement in millimetres. This allows you to monitor wear over time and replace tyres when they reach the recommended safety limit of 3mm, rather than waiting until the legal minimum of 1.6mm.
There are two common types: digital and manual (plunger-style). To use one:
- Press the foot of the gauge firmly against the tread blocks on either side of a groove.
- Push the measuring probe down into the bottom of the groove.
- Read the measurement from the digital screen or the manual scale.
As with the coin test, measure in several locations across and around each tyre. A gauge is particularly useful for identifying subtle, uneven wear patterns that a coin might miss.
Inspect for Uneven Wear and Damage
The pattern of wear on your tyres can tell you a lot about the health of your vehicle's steering, suspension, and alignment. While you're checking the depth, look at how the tread is wearing down.
- Wear on both outer edges: This is a classic sign of under-inflation. The tyre is not supported properly in the middle, causing the edges to take most of the load.
- Wear in the centre of the tread: This points to over-inflation. Too much air pressure causes the centre of the tyre to bulge out, lifting the shoulders off the road and concentrating wear in the middle.
- Wear on one single edge (inner or outer): This is typically caused by incorrect wheel alignment (tracking). The wheel is not pointing straight ahead, causing one edge of the tyre to be scrubbed along the road surface.
- Patchy or scalloped wear (cupping): This often indicates a problem with wheel balancing or worn suspension components like shock absorbers.
Identifying these patterns early can help you fix an underlying mechanical issue before it destroys a new set of tyres.
Conduct a Visual Check of the Sidewalls
Tread depth is only part of the story. The tyre's structural integrity is just as important. With your torch, carefully inspect the entire inner and outer sidewall of each tyre.
Look for any cuts, cracks, blisters, or bulges. A bulge indicates that the internal structure of the tyre has failed, and a catastrophic failure (a blowout) could be imminent. Similarly, deep cracks or cuts can expose the internal ply cords and weaken the tyre. Any of these signs mean the tyre is unsafe to use, regardless of its tread depth, and must be replaced immediately.
Repeat the Process for All Tyres, Including the Spare
A vehicle is only as safe as its weakest tyre. Be systematic and repeat the entire inspection process—tread depth, wear pattern, and sidewall check—for all four tyres on your vehicle. It's easy to focus on the front tyres and forget the rears, but they are equally important for stability and grip.
Finally, don't forget the spare tyre. If you have a full-size spare, it must be legally roadworthy with at least 1.6mm of tread. If you have a temporary-use "space-saver" spare, check that it is inflated to its specified pressure (which is often much higher than a standard tyre) and has no visible damage. The last thing you want in an emergency is to find your spare is flat or damaged.
Common Problems When You Check Tire Tread
Even a simple check can present issues. Here are some common problems and how to resolve them.
- Problem: The 20p coin suggests the tread is borderline.
Solution: Don't guess and don't take the risk. A borderline reading means it's time for a more accurate check. Use a proper tread depth gauge or, better yet, visit a local tyre fitter. Most reputable garages will perform a free, no-obligation tread check for you. The potential fine (£2,500 and 3 points per tyre) is far greater than the cost of a new tyre. - Problem: The measurements vary significantly across the same tyre.
Solution: This confirms you have an uneven wear problem. Legally, the tyre's depth is determined by its lowest point. You must address the root cause, which is likely wheel alignment, balancing, or incorrect inflation. Get a professional diagnosis to avoid the same thing happening to your next set of tyres. - Problem: You find a nail or screw embedded in the tread.
Solution: Do not pull it out. Leaving it in place often creates a temporary plug, preventing rapid air loss. Check the tyre pressure immediately. If it's holding air, drive slowly and carefully to the nearest tyre repair shop. If it's going flat, change to your spare wheel before driving.
Advanced Tips for Tire Tread Checks
Go beyond the basic legal check to maximise safety and the lifespan of your tyres.
- Adopt the 3mm Rule: While 1.6mm is the legal minimum, tyre performance in wet weather drops off significantly below 3mm of tread. The grooves are less effective at channelling water away, leading to a much higher risk of aquaplaning and dramatically longer braking distances. For maximum safety, especially in autumn and winter, plan to replace your tyres when they reach 3mm.
- Check Tyre Pressures When Cold: Tyre pressure is the foundation of tyre health. Check pressures at least monthly, but always do it when the tyres are cold (i.e., have been driven for less than two miles). Driving heats the air inside the tyre, increasing its pressure and giving you a false reading. The correct pressures are shown on a sticker inside the driver's door jamb, fuel filler cap, or in the vehicle's manual.
- Understand Tyre Age: Rubber degrades over time, becoming hard and brittle, regardless of tread depth. Check the four-digit code on the tyre's sidewall. For example, '3223' means the tyre was manufactured in the 32nd week of 2023. Most manufacturers recommend replacing tyres that are over 7-10 years old, even if they have ample tread.
Quick Reference
| Situation | Check This | Why |
|---|---|---|
| Outer band of 20p coin is visible | Replace tyre immediately | The tread is below or at the 1.6mm legal limit and is unsafe. |
| Tread worn on both outer shoulders | Tyre pressure (likely too low) | Under-inflation causes the tyre's edges to carry the vehicle's weight. |
| Tread worn down the centre line | Tyre pressure (likely too high) | Over-inflation causes the centre of the tyre to bulge and wear prematurely. |
| Tread worn on one edge only | Wheel alignment (tracking) | The wheel is "scrubbing" along the road instead of rolling smoothly. |
| Tread depth is between 1.6mm and 3mm | Plan for replacement | The tyre is legal but its wet-weather performance is significantly reduced. |
How To Check Tire Tread FAQ
What are the penalties for having illegal tyres in the UK?
Why is checking the central 75% of the tyre so important?
Do these checks apply to my caravan or trailer tyres?
Can I top up my tyre pressure at a petrol station?
Final Checklist for Checking Tire Tread
- Vehicle is parked securely on a flat, level surface with the handbrake on.
- Front wheels are turned to full lock for easy access.
- Tread wear indicator bars have been located and are not flush with the tread.
- The 20p test has been performed, and the outer band is not visible.
- Accurate measurements have been taken with a tread depth gauge (if available).
- Multiple points across the central three-quarters and around the circumference of each tyre have been checked.
- A visual inspection for uneven wear patterns has been completed.
- The inner and outer sidewalls have been inspected for cuts, cracks, and bulges.
- All four road tyres and the spare tyre have been thoroughly checked.
- A note has been made to check tyre pressures (when cold) as the next step in your vehicle maintenance.